10 DIY Home Decor Projects That Instantly Upgrade Your Space


If you’ve ever looked around your home and thought, “It just needs a little something…” — you’re not alone. The good news? You don’t need a full renovation or a huge budget to make your space feel fresh and stylish. Sometimes, it’s the simple projects that pack the biggest punch.
That’s why I rounded up 10 DIY home decor projects that instantly upgrade your space. They’re affordable, fun to try, and totally Pinterest-worthy. Even better? Most of the items and supplies can be found right on Amazon so you can get inspired and shop without leaving the couch.
So grab your coffee (or your glue gun 😉) and let’s dive into the first 10 ideas that will make your home feel like it belongs in a magazine.
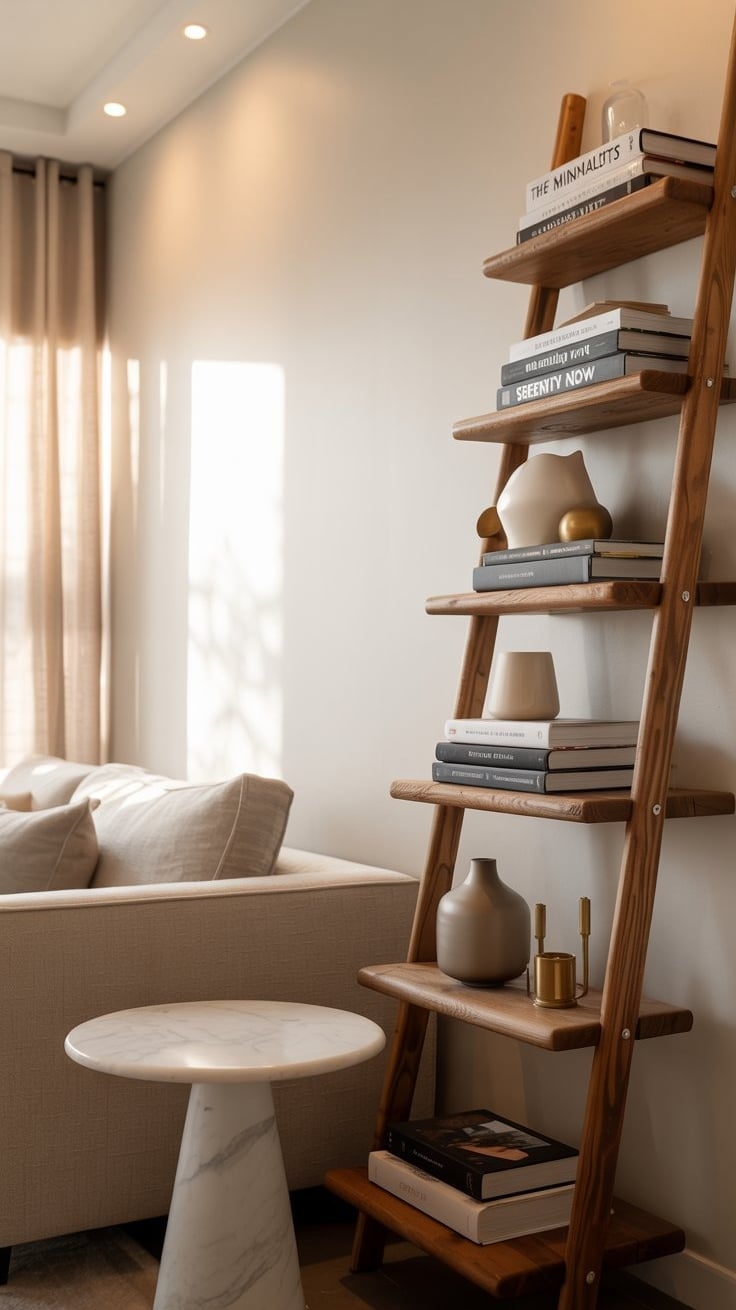
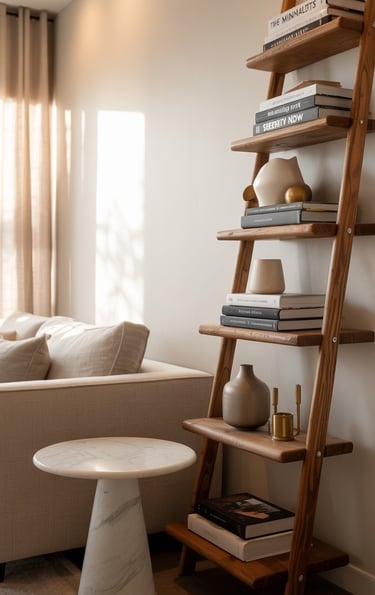
Have you ever walked past an old wooden ladder at a thrift shop or garage sale and thought, “That could be something”? With a little creativity, it absolutely can. An upcycled ladder bookshelf is one of those projects that transforms something forgotten into a functional statement piece.
Why This Project Works
It adds instant character. A rustic ladder brings warmth and charm to any corner.
It’s space-saving. Perfect for apartments, home offices, or a small reading nook.
It’s budget-friendly. Old ladders are inexpensive, and you only need a few shelves or planks to bring it together.
How to Style It
Lean your ladder against the wall, add wooden or glass shelves across the steps, and decorate with a mix of books, plants, candles, and storage baskets. Think of it as functional art—every shelf becomes an opportunity to showcase your style.
Recommended Finds
Rustic Decorative Ladder Shelf – a ready-to-use option for quick styling
Set of 3 Floating Wooden Shelves – perfect planks to place across rungs
Designer-Style Storage Baskets – both practical and elegant
Faux Greenery Plants – low-maintenance styling that looks real
With just a ladder and a little imagination, you’ll have a bookshelf that looks like it belongs in a design magazine.
Project 1: Upcycled Ladder Bookshelf
Project 2: Hand-Painted Flower Pots
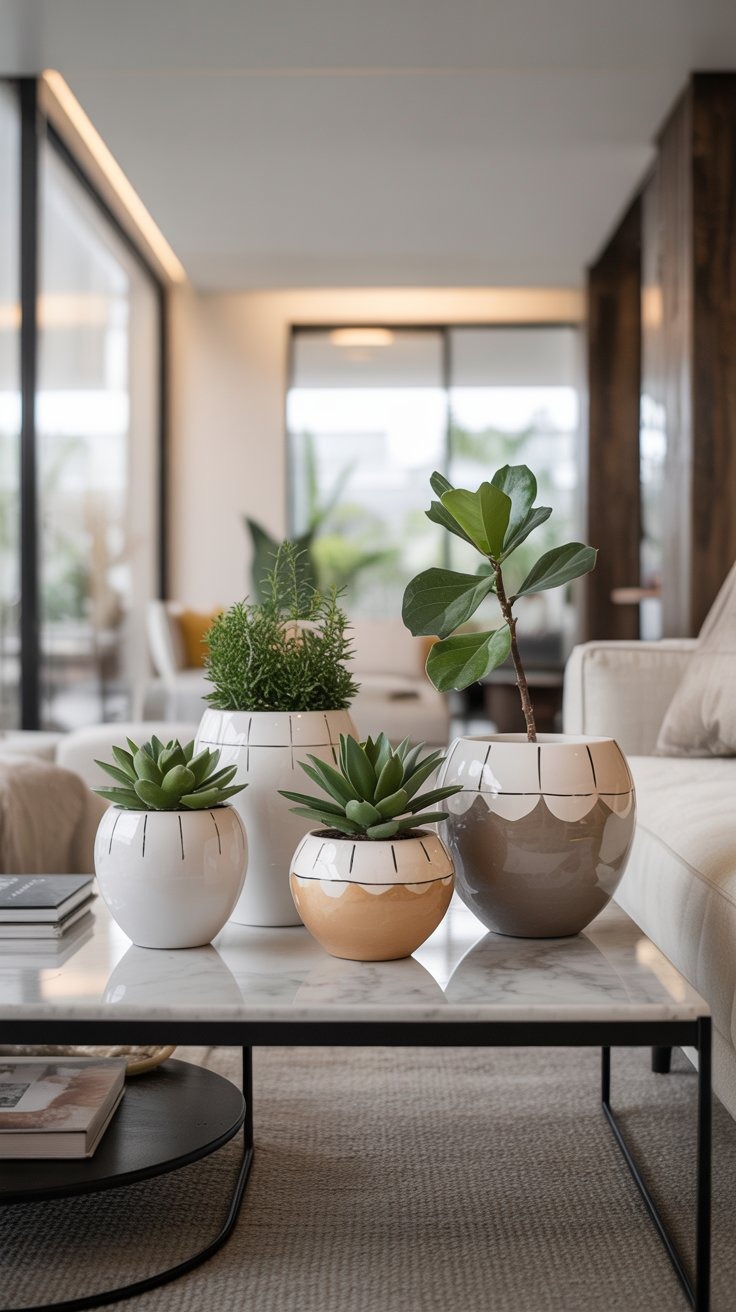
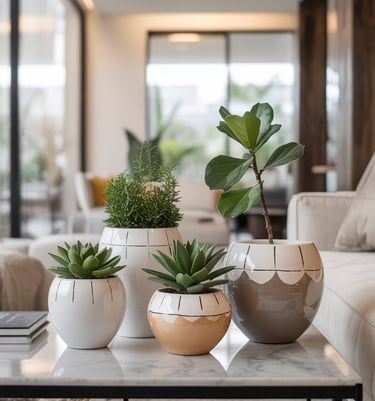
If you’re looking for a project that’s both simple and rewarding, hand-painted flower pots are an excellent place to start. They add a personal touch to any room and make even the most ordinary plants feel like statement pieces.
Why This Project Works
It’s beginner-friendly. You don’t need special skills—just some paint and creativity.
It’s customizable. Match your colors to your decor, or go bold with patterns that pop.
It’s budget-conscious. Basic terra cotta pots are inexpensive, and a little paint goes a long way.
How to Style It
Use your pots to showcase houseplants like succulents, orchids, or herbs. Neutral tones create a modern and calming effect, while vibrant colors or geometric designs bring energy and playfulness into the space. Grouping several pots together on a windowsill, bookshelf, or console table makes the biggest impact.
Recommended Finds
Set of 6 Terra Cotta Pots – the perfect blank canvas for your designs
Acrylic Paint Set with Brushes – versatile colors for any style
Matte Spray Sealer – to protect your finished work
Decorative Faux Succulents – great for styling without upkeep
This is one of those projects that delivers instant satisfaction. A simple pot of greenery becomes an eye-catching piece of decor when you give it your own creative touch.
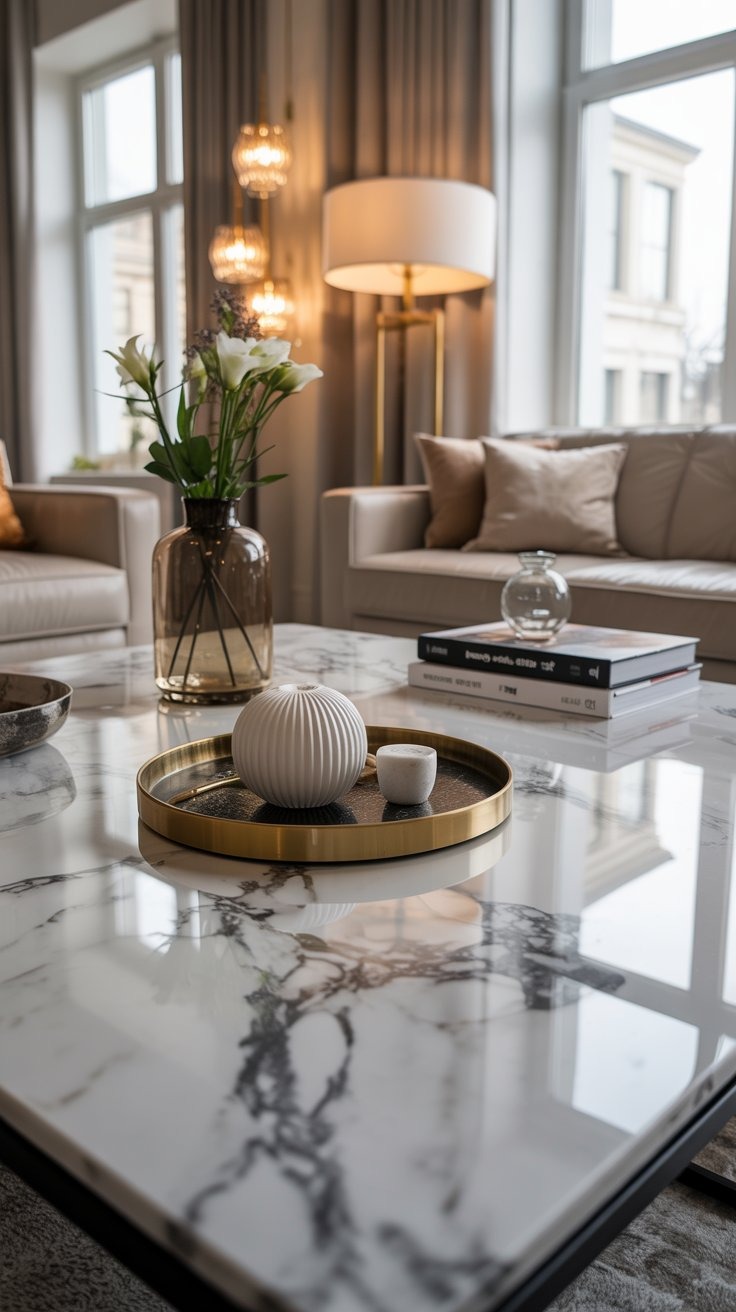
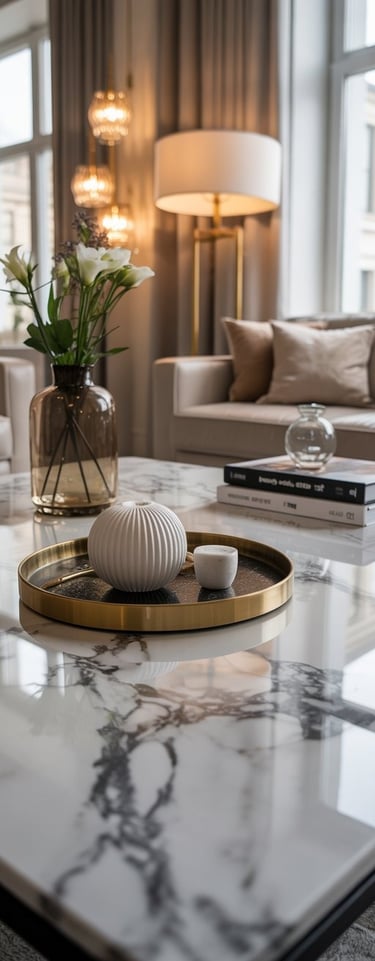
Project 3: Faux Marble Table Makeover
Love the look of marble but not the price tag? You’re not alone. A faux marble table makeover is one of those DIY projects that delivers a luxurious result for a fraction of the cost. With the right materials and a little patience, you can create a piece that looks high-end and completely transforms your space.
Why This Project Works
It gives instant elegance. Marble has a timeless appeal that elevates any room.
It’s budget-friendly. Using contact paper or paint techniques costs a fraction of real marble.
It’s customizable. Choose between white, gray, or black marble patterns to match your decor.
How to Do It
Start with a clean, smooth tabletop—wood, laminate, or even metal works well. If you’re using marble contact paper, carefully apply it from one edge to the other, smoothing out bubbles as you go. Trim the edges and use a heat gun or hair dryer to seal the corners for a professional finish.
If you prefer a painted faux marble look, use a base coat of white paint and lightly layer gray veining with a small brush or sponge. Blend gently and seal with a glossy top coat for that realistic marble shine.
How to Style It
Pair your finished piece with elegant accents like gold or brass decor, clean white candles, and chic coffee table books. A few small touches can make your new table feel like it came straight from a designer showroom.
Recommended Finds
Marble Contact Paper Roll – easy to apply and realistic
Heat Gun for DIY Projects – helps seal corners perfectly
Acrylic Sealer Spray – for a long-lasting finish
Gold Accent Tray – completes the high-end look
This project is the perfect blend of creativity and sophistication. It proves that a little effort and attention to detail can make even the simplest furniture piece look polished and expensive.
Project 4: Fabric Wall Art
Project 5: DIY Macrame Plant Hangers
Project 6: Vintage Suitcase Side Table
Project 7: Repurposed Glass Jars
Project 8: Customized Throw Pillows
Project 10: Wall-Mounted Bookshelves
Project 9: Upcycled Wooden Pallet Coffee Table
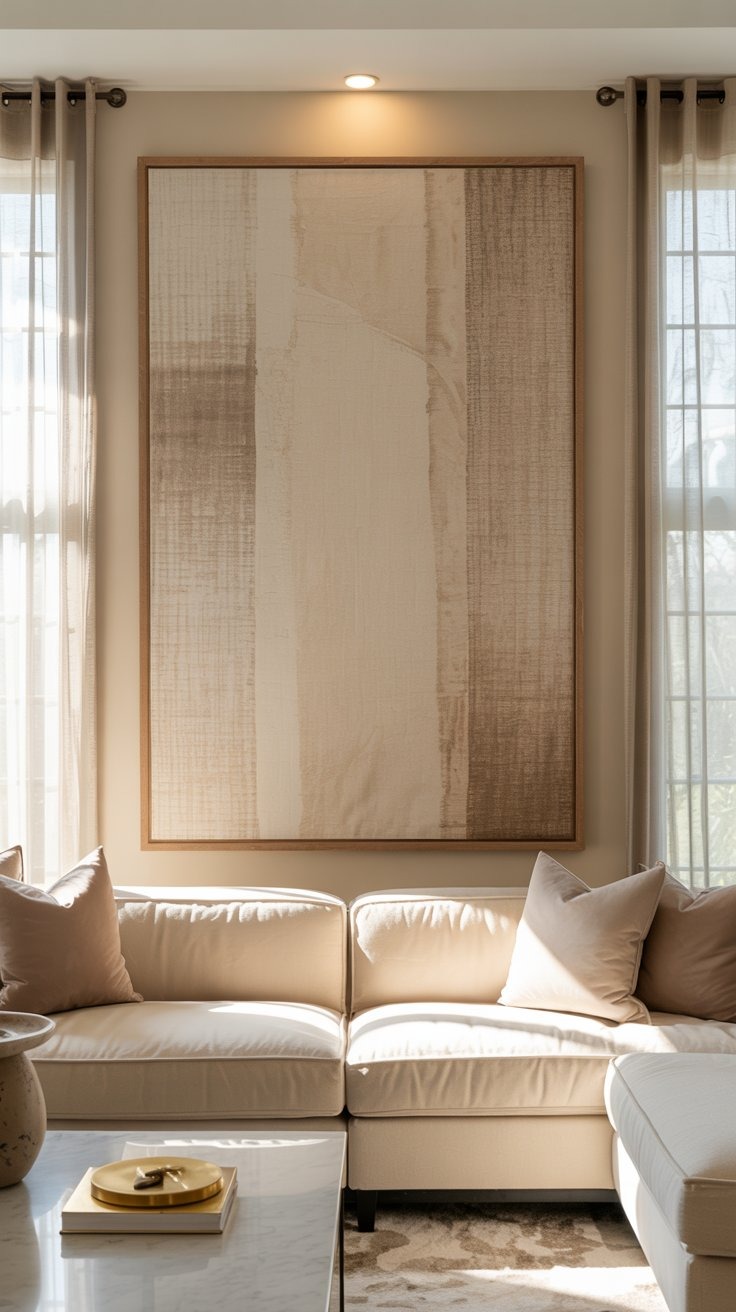
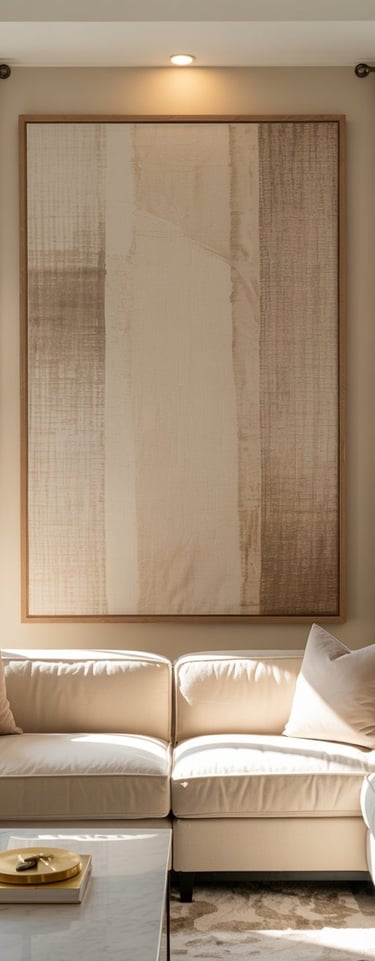
When your walls need something more than a framed print, fabric wall art is an elegant way to add texture, warmth, and visual interest to any space. This project combines creativity with simplicity and can be customized to fit nearly any interior style.
Why This Project Works
It brings depth and texture to your walls without feeling heavy or cluttered.
It’s budget-conscious since a single yard of fabric can make a large impact.
It’s easy to personalize with endless colors, patterns, and frame options.
How to Do It
Start by selecting a fabric that fits your space. Linen, cotton, or even patterned upholstery fabrics work beautifully. Cut your fabric to fit a wooden or metal frame, leaving a few extra inches around the edges. Stretch the fabric evenly and secure it with a staple gun or adhesive spray. For a clean, polished look, wrap the fabric tightly and fold the corners neatly before securing.
If you prefer a no-frame option, try mounting the fabric on foam board or canvas. This lightweight version works especially well for renters who want stylish wall art without nails or screws.
How to Style It
Hang a single large piece above a sofa, bed, or console table for a dramatic focal point, or create a gallery wall using smaller panels in complementary colors. Pair your new wall art with neutral decor, soft lighting, and minimalist accessories to let the texture stand out.
Recommended Finds
Upholstery Fabric by the Yard – available in linen, velvet, or cotton blends
Large Wooden Frame – ideal for a statement wall piece
Adhesive Spray for Fabric Projects – ensures a smooth, secure hold
Mounting Hardware Kit – keeps your finished piece level and professional-looking
This project proves that wall art doesn’t need to be expensive to make an impact. A single piece of beautifully framed fabric can shift the entire mood of a room, making it feel curated and intentional.
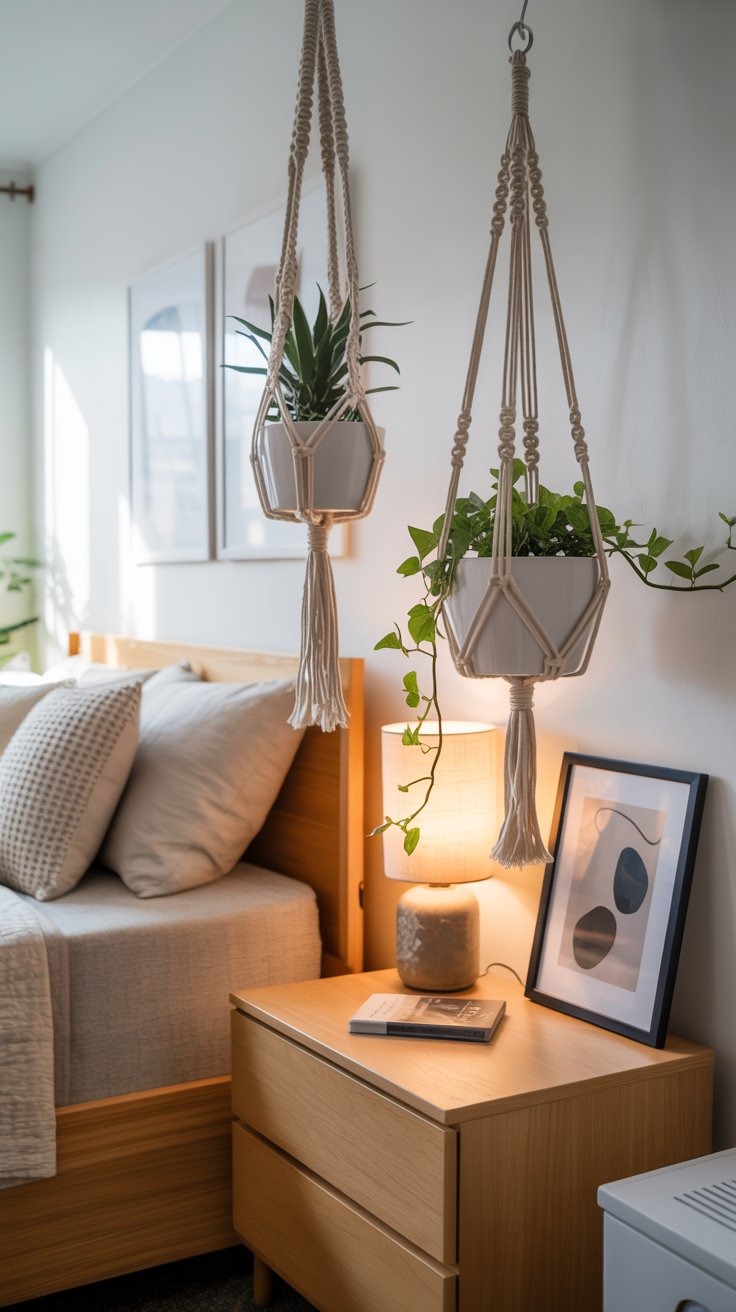
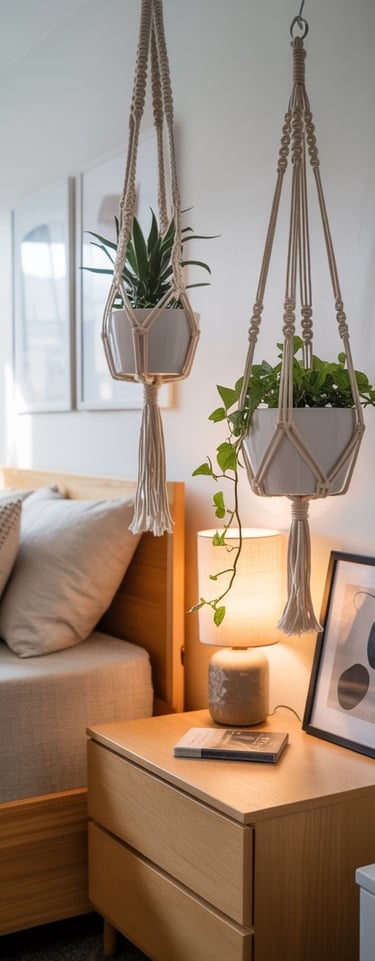
If you’ve been looking for a way to bring more greenery into your home without taking up valuable surface space, macrame plant hangers are the perfect solution. They’re timeless, stylish, and surprisingly easy to make. Even if you’ve never worked with macrame before, you’ll find this project relaxing and rewarding.
Why This Project Works
It’s decorative and functional, giving plants a place to shine while freeing up tabletops and counters.
It fits any style, from modern boho to coastal minimalism.
It’s budget-friendly, using simple materials that create a big design impact.
How to Make It
You’ll need macrame cord, a wooden or metal ring, and scissors. Start by cutting several equal-length strands of cord and looping them through the ring to form the base. From there, tie a series of simple knots to create your pattern. The beauty of macrame is that it looks intricate but relies on only a few basic knot styles.
Once you’ve finished your design, gather the cords together at the bottom and secure them with a tight knot. Place your plant pot inside, adjust the cords for balance, and hang it near a window or in a cozy corner.
Styling Ideas
Macrame hangers look best when layered at different heights. Hang two or three in varying sizes to create visual interest. Pair them with woven baskets, wooden accents, and warm lighting for a cohesive, nature-inspired look.
Recommended Finds
Macrame Cord Roll – sturdy and soft for detailed knot work
Wooden Ring Set – the perfect anchor for your hangers
Decorative Planter Pots – modern and lightweight options that fit snugly
Ceiling Hook Kit – strong, easy to install, and renter-friendly
DIY macrame plant hangers add character and charm to any home. Whether you prefer a single hanging pot by the window or a full green corner display, this project brings life and texture to your space effortlessly.
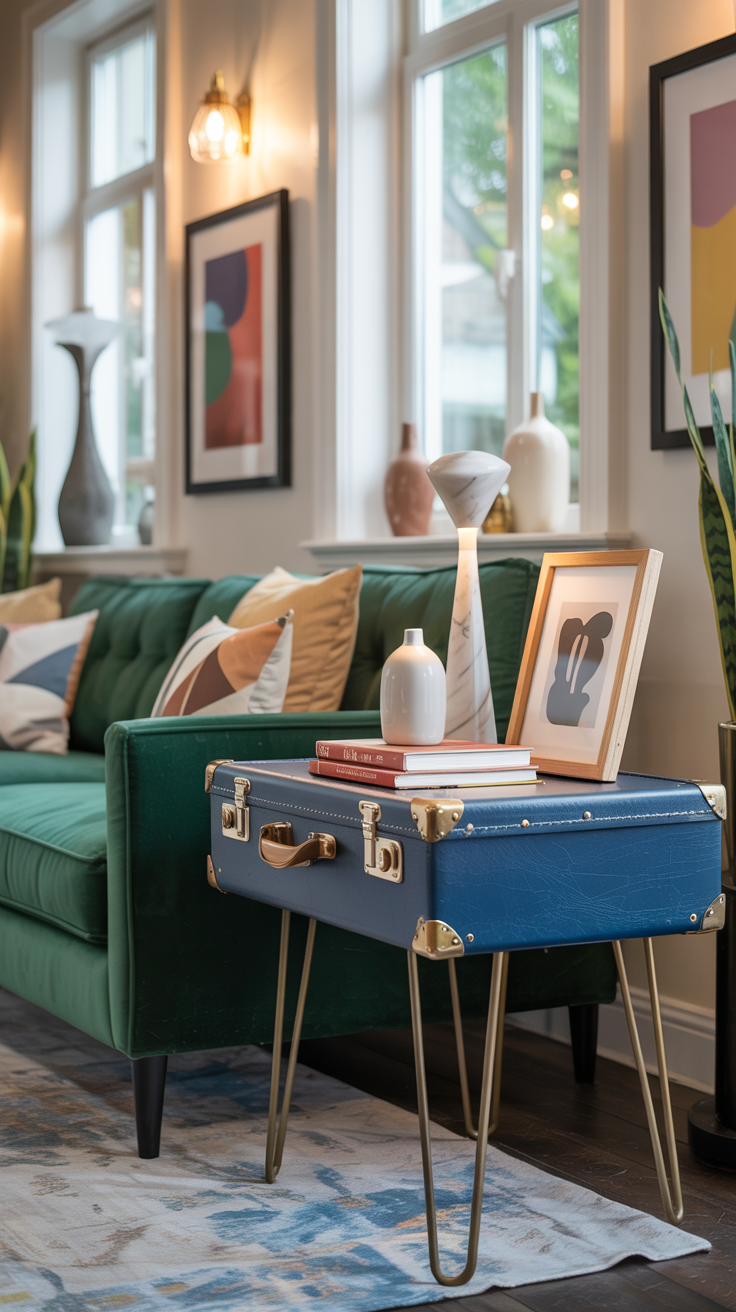
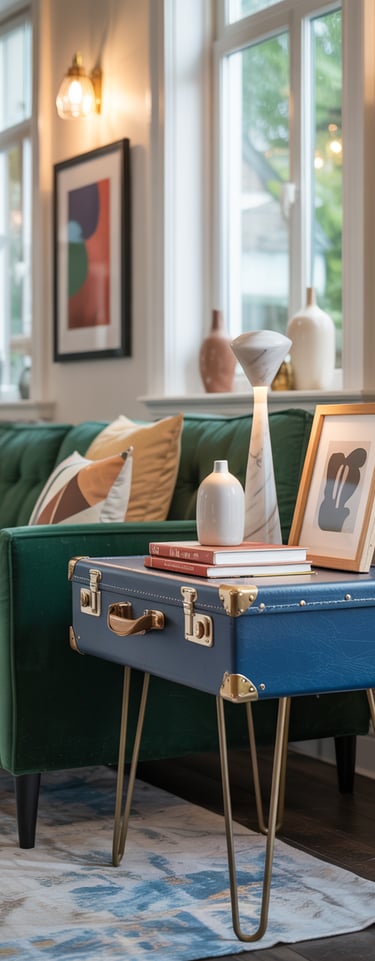
There’s something special about giving old objects new life, and this vintage suitcase side table is the perfect example. It’s charming, practical, and adds a sense of history to your space. Whether you use it as a nightstand, an entryway accent, or a small living room table, it instantly becomes a conversation piece.
Why This Project Works
It adds character and warmth to any room. Vintage suitcases bring an old-world charm that modern furniture can’t replicate.
It’s functional. You get both style and storage in one clever piece.
It’s unique. No two tables will ever look exactly alike, giving your home a custom feel.
How to Make It
Find a sturdy suitcase with a flat top and solid structure—thrift stores and online marketplaces are great places to start. Clean it thoroughly and, if needed, reinforce the interior with lightweight plywood for stability.
Attach wooden table legs or metal hairpin legs to the bottom using screws and brackets. Choose a leg style that complements your room: mid-century tapered legs for a modern look, or turned wood for a more traditional style.
Once assembled, polish any metal hardware and add protective pads under the legs to prevent floor scratches.
Styling Ideas
Use your suitcase table as a nightstand topped with a small lamp, a stack of books, and a vase of flowers. In the living room, it makes a perfect side table for holding a candle, a tray, or decorative coasters. Its nostalgic aesthetic pairs beautifully with soft lighting and vintage-inspired decor.
Recommended Finds
Metal Hairpin Legs Set – easy to attach and durable
Wood Polish and Cleaner – restores luster to vintage surfaces
Decorative Tray – perfect for styling your finished table
LED Table Lamp – adds warmth and elegance
This DIY project proves that upcycling can be both creative and refined. With just a few simple tools, you can transform a forgotten piece of luggage into a sophisticated accent that feels right at home in any room.
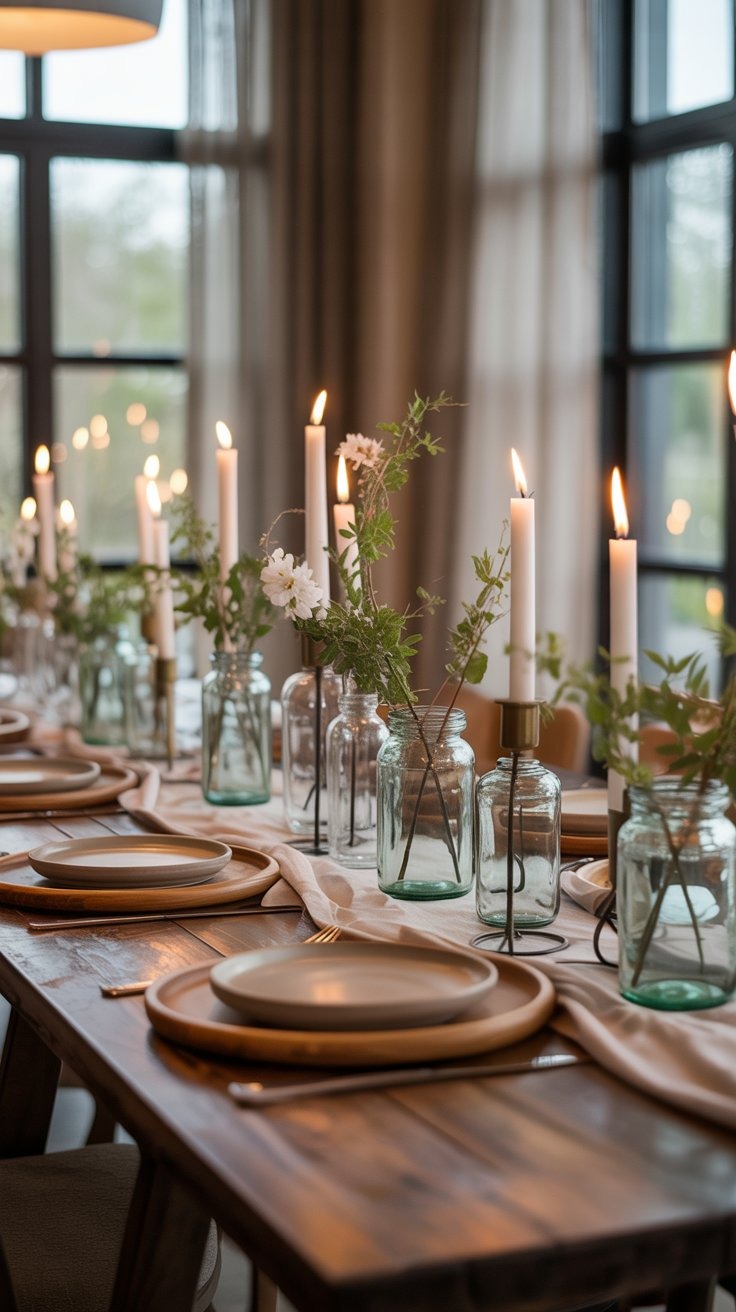
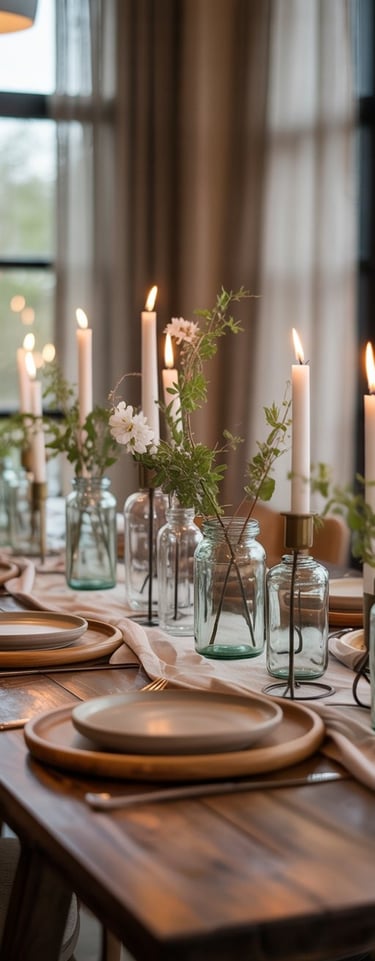
Sometimes the best home decor pieces are the ones you already have. Repurposed glass jars are a simple yet incredibly versatile way to add charm and functionality to your space. From candle holders and mini vases to pantry organizers and bathroom storage, they bring a polished, eco-friendly touch to every corner of your home.
Why This Project Works
It’s sustainable. Reusing jars keeps waste out of landfills and gives everyday items a new purpose.
It’s cost-effective. You’re transforming what you already own instead of buying new decor.
It’s visually appealing. Clear glass adds a light, airy look that complements any style.
How to Do It
Start by collecting jars in different shapes and sizes—spaghetti sauce, jam, or candle jars work beautifully. Soak them in warm soapy water to remove labels and residue. Once clean and dry, you can leave them clear for a minimalist look or decorate them using paint, twine, or adhesive labels.
For a rustic touch, wrap the tops with jute or ribbon. For something more refined, spray-paint the lids in metallic tones or add frosted glass spray for a soft matte finish. Group similar styles together for a cohesive display.
Styling Ideas
Use small jars as tea light holders on a dining table or fill medium jars with flowers for an effortless centerpiece. Larger jars make perfect kitchen canisters for pasta, grains, or snacks. In the bathroom, they’re ideal for cotton swabs, bath salts, or makeup brushes.
Recommended Finds
Frosted Glass Spray Paint – creates an elegant matte finish
Jute Twine Roll – adds texture and a rustic feel
Label Sticker Set – perfect for pantry or bathroom organization
LED Tea Light Candles – safe and reusable lighting option
With just a few creative touches, simple glass jars become timeless home accents. This project proves that thoughtful details can transform everyday items into beautiful, purposeful decor pieces.
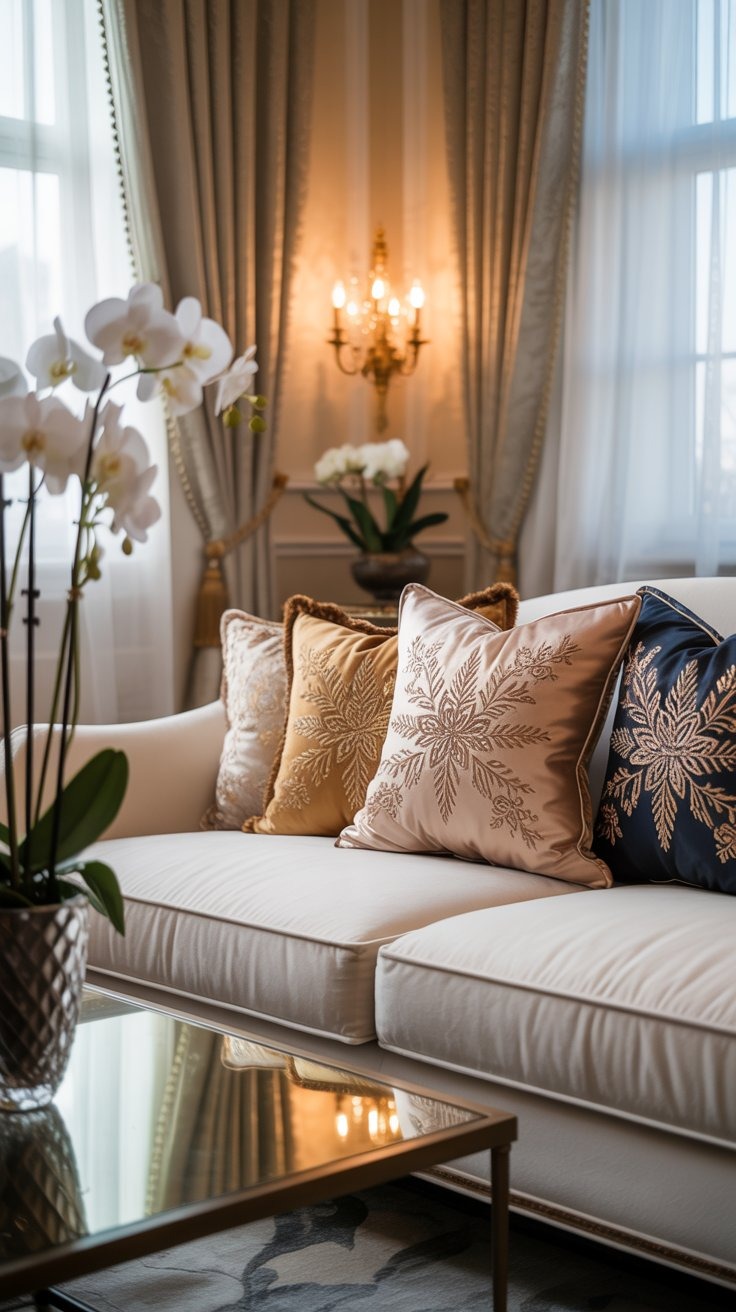
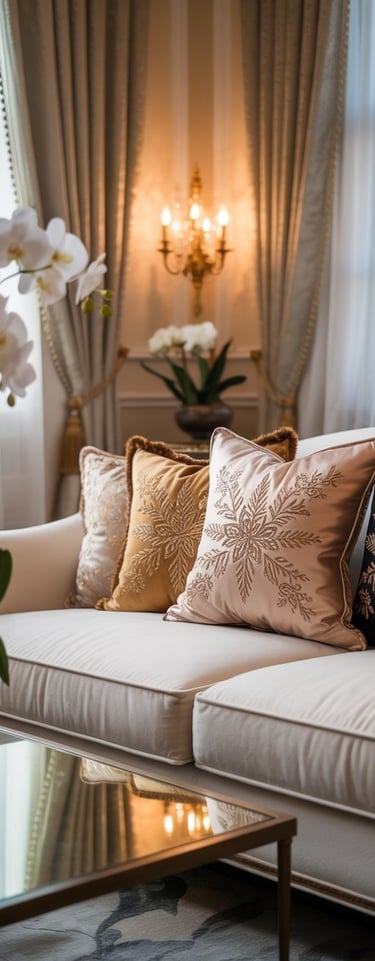
Nothing refreshes a room faster than new throw pillows. With a little creativity, customized throw pillows let you experiment with color, texture, and design—without investing in all-new furniture. Whether you sew your own covers or personalize ready-made ones, this project adds comfort and personality to any space.
Why This Project Works
It’s affordable and high-impact. Small changes like pillows can completely change a room’s atmosphere.
It’s customizable. Choose colors, prints, or patterns that reflect your style or the current season.
It’s low-commitment. You can easily swap covers throughout the year for a fresh look.
How to Make It
If you’re sewing your own covers, start with durable yet soft fabric such as linen, cotton, or velvet. Cut two squares slightly larger than your pillow insert, sew three sides, insert the cushion, and close with a zipper or envelope fold.
For no-sew options, use iron-on adhesive tape to seal the seams. To personalize store-bought covers, add painted designs, stenciled quotes, or embroidered initials for a custom finish.
Styling Ideas
Group pillows in sets of three or five for a balanced look. Mix solid colors with subtle patterns, and play with textures like faux fur, linen, or knit. In living rooms, layer them on sofas and armchairs; in bedrooms, stack them neatly against shams or quilts. Stick to a cohesive palette—neutral tones with one accent color usually look most polished.
Recommended Finds
Set of Linen Pillow Covers – soft, breathable, and easy to style
Velvet Cushion Covers – adds depth and elegance
Fabric Paint Set – perfect for custom designs or stencils
Throw Pillow Inserts – plush and supportive for long-lasting comfort
Customized throw pillows are the perfect mix of creativity and practicality. With a few fabric choices and personal touches, you can give your home a designer look that still feels completely your own.
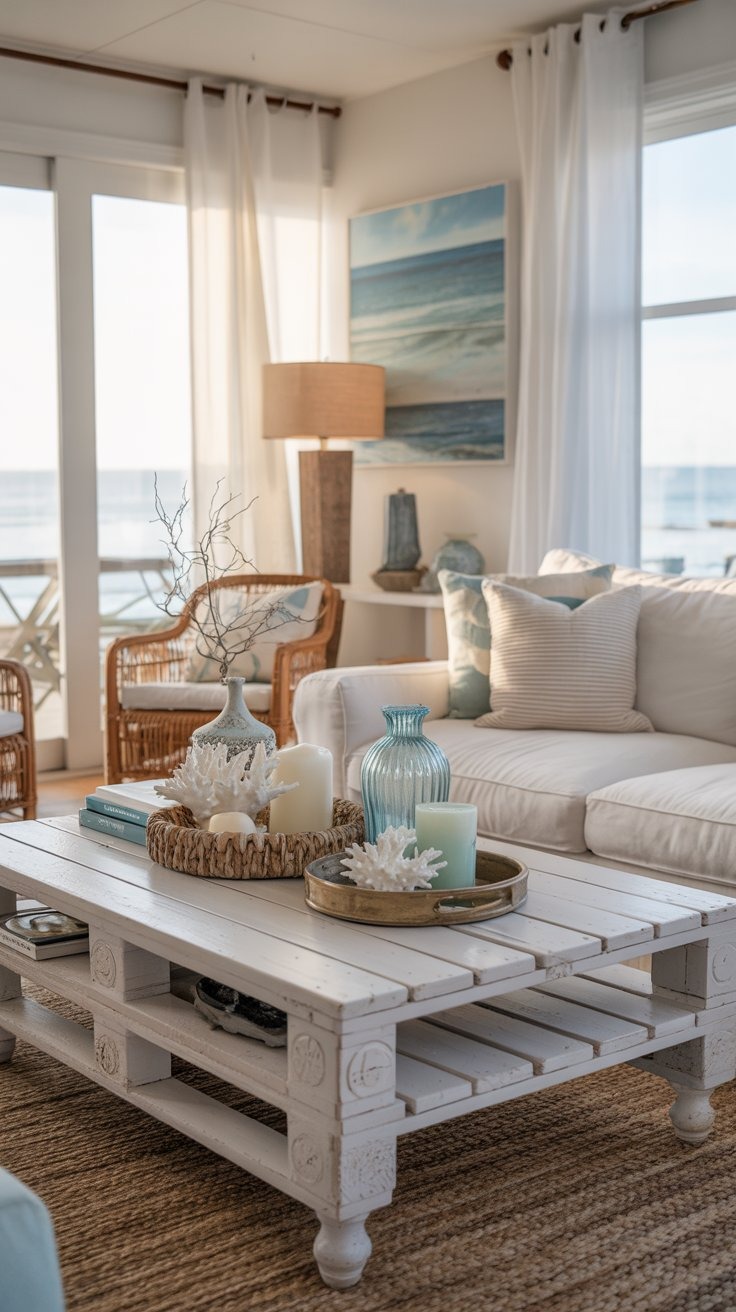
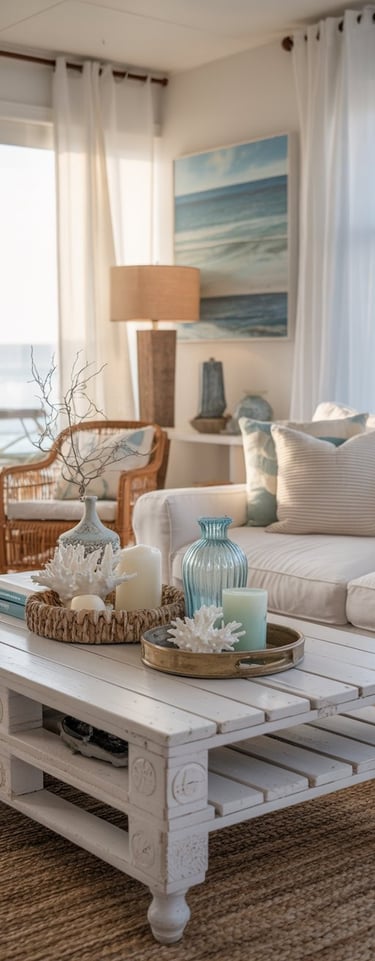
There’s a reason wooden pallets are a favorite among DIY enthusiasts. They’re affordable, easy to find, and incredibly versatile. An upcycled pallet coffee table combines rustic charm with modern functionality, creating a statement piece that’s both eco-friendly and practical.
Why This Project Works
It’s sustainable. Repurposing pallets reduces waste while giving new life to industrial materials.
It’s customizable. You can keep it rustic or finish it with stain and varnish for a more polished look.
It’s budget-friendly. A few pallets, screws, and a coat of paint or sealant are all you need.
How to Make It
Begin by selecting two to three clean, undamaged pallets. Sand them thoroughly to remove rough edges and splinters. Stack and align them for the desired height, securing with screws or brackets.
Add caster wheels to the bottom for mobility or attach simple wooden legs for a stationary version. For a smoother, modern finish, stain the wood in a warm tone or apply a clear sealant to highlight the natural grain.
If you want a more refined look, top the table with a cut-to-size piece of tempered glass. This not only makes cleaning easier but also adds a sophisticated touch that complements any interior.
Styling Ideas
Dress your table with a decorative tray, a stack of coffee table books, and a small vase or candle. Pair it with neutral-toned furniture to let the wood stand out, or add contrast with metallic accents. The combination of raw materials and clean lines makes this piece fit seamlessly into both rustic and contemporary settings.
Recommended Finds
Wood Stain and Sealant Set – enhances natural grain while protecting the surface
Tempered Glass Tabletop – adds a modern touch and durability
Industrial Caster Wheels – easy to install for mobility and style
Decorative Tray Set – ideal for organizing tabletop accents
This project embodies the essence of upcycling: simple materials transformed into something stylish and useful. With minimal effort and creativity, a basic pallet can become the centerpiece of your living room.
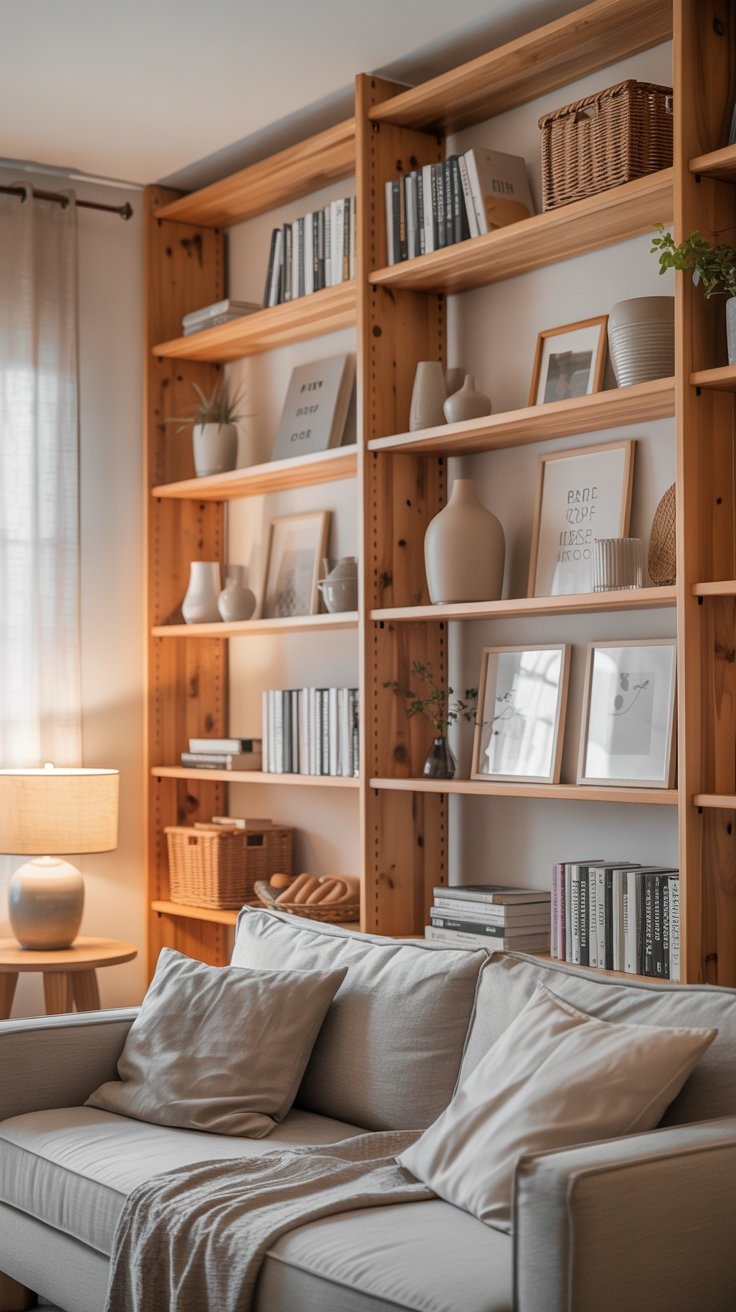
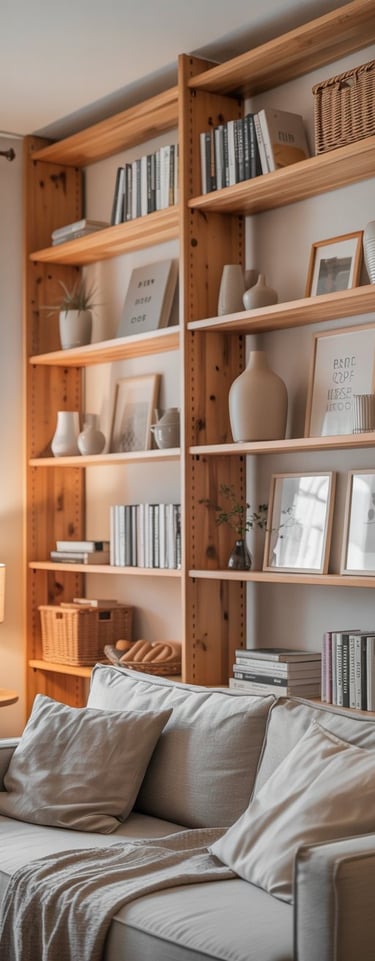
Few DIY projects combine style and function as seamlessly as wall-mounted bookshelves. They save floor space, add character to your walls, and create an opportunity to showcase your favorite books and decor pieces. Whether you prefer sleek modern lines or rustic wooden shelves, this project works beautifully in any room.
Why This Project Works
It’s space-saving. Ideal for small rooms or apartments where every inch counts.
It’s stylish and flexible. You can customize the materials, length, and arrangement to suit your taste.
It’s high-impact. Shelves draw the eye upward, making a room feel taller and more open.
How to Make It
Start by choosing durable wood planks that complement your decor. Light oak or maple suits minimalist interiors, while reclaimed wood adds warmth and texture. Measure your wall space carefully, mark where each shelf will sit, and ensure they’re level before drilling.
Use strong metal brackets for support—either visible for an industrial look or hidden floating brackets for a clean, modern appearance. Once mounted, check stability and give the wood a quick coat of protective finish if needed.
Styling Ideas
Arrange your shelves with a mix of books, plants, framed photos, and decorative accents. Keep balance in mind: vary heights and textures, and leave some negative space to avoid a cluttered look. If you’re styling above a desk or couch, three shelves in staggered lengths usually look best.
Recommended Finds
Wood Plank Set – pre-cut and sanded for easy installation
Cordless Drill and Bit Kit – essential for secure mounting
Decorative Book Set – adds style and color to your finished shelves
Wall-mounted bookshelves offer both function and beauty, giving you an elegant way to display your personality through decor. With just a few tools and a thoughtful layout, this project transforms empty walls into polished, purposeful design features.
Thanks for reading!
I’m Emma Brooks — creator, home enthusiast, and believer that style doesn’t have to be complicated or expensive. If you found this post helpful, follow me on Pinterest for more DIY inspiration, affordable home decor ideas, and design tips you can actually use.
Affiliate Disclosure:
This post contains affiliate links. As an Amazon Associate, I may earn a small commission from qualifying purchases—at no extra cost to you. Every link I share is something I’ve personally used, loved, or would genuinely recommend for your home.